仓库管理系统之:GitLab
GitLab是一个利用 Ruby on Rails 开发的开源应用程序,实现一个自托管的Git项目仓库,可通过Web界面进行访问公开的或者私人项目。
GitLab拥有与Github类似的功能,能够浏览源代码,管理缺陷和注释。可以管理团队对仓库的访问,它非常易于浏览提交过的版本并提供一个文件历史库。它还提供一个代码片段收集功能可以轻松实现代码复用,便于日后有需要的时候进行查找。
1、安装相关依赖
yum install curl policycoreutils openssh-server openssh-clients postfix
systemctl enable postfix
systemctl start postfix
2、添加GitLab仓库
curl -sS https://packages.gitlab.com/install/repositories/gitlab/gitlab-ce/script.rpm.sh | sudo bash
3、安装GitLab
yum install -y gitlab-ce
4、配置GitLab
gitlab-ctl reconfigure
这一步执行时间较长。执行完后可以先查看下GitLab的状态
[root@localhost ~]# gitlab-ctl status
run: alertmanager: (pid 37068) 556s; run: log: (pid 26280) 1061s
run: gitaly: (pid 36057) 569s; run: log: (pid 24906) 1258s
run: gitlab-monitor: (pid 36992) 562s; run: log: (pid 25965) 1102s
run: gitlab-workhorse: (pid 36959) 565s; run: log: (pid 25681) 1132s
run: logrotate: (pid 25765) 1122s; run: log: (pid 25781) 1121s
run: nginx: (pid 25709) 1128s; run: log: (pid 25724) 1127s
down: node-exporter: 0s, normally up, want up; run: log: (pid 25866) 1115s
run: postgres-exporter: (pid 37083) 555s; run: log: (pid 26428) 1034s
run: postgresql: (pid 25127) 1246s; run: log: (pid 25173) 1243s
run: prometheus: (pid 37014) 561s; run: log: (pid 26155) 1077s
run: redis: (pid 24778) 1268s; run: log: (pid 24827) 1265s
run: redis-exporter: (pid 37003) 562s; run: log: (pid 26051) 1090s
run: sidekiq: (pid 25552) 1141s; run: log: (pid 25578) 1138s
run: unicorn: (pid 25469) 1146s; run: log: (pid 25496) 1145s
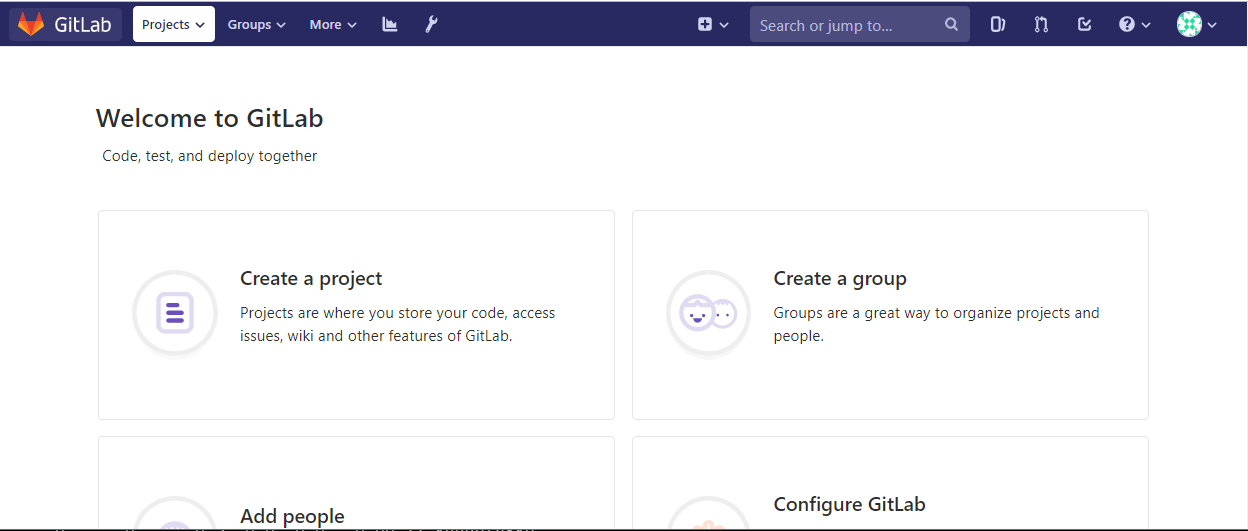
一切都正常后,可以通过http://ip进行访问,第一次进入需要设置root的密码,设置完后会重新进行登录。登录后的界面如下:
5、配置仓库的地址
[root@localhost ~]# cd /opt/gitlab/embedded/service/gitlab-rails/config
[root@localhost config]# vim gitlab.yml #编辑,修改host为自己域名或IP
  ## GitLab settings
  gitlab:
    ## Web server settings (note: host is the FQDN, do not include http://)
    host: 192.168.71.109
    port: 80
    https: false
[root@localhost config]# gitlab-ctl restart #重启
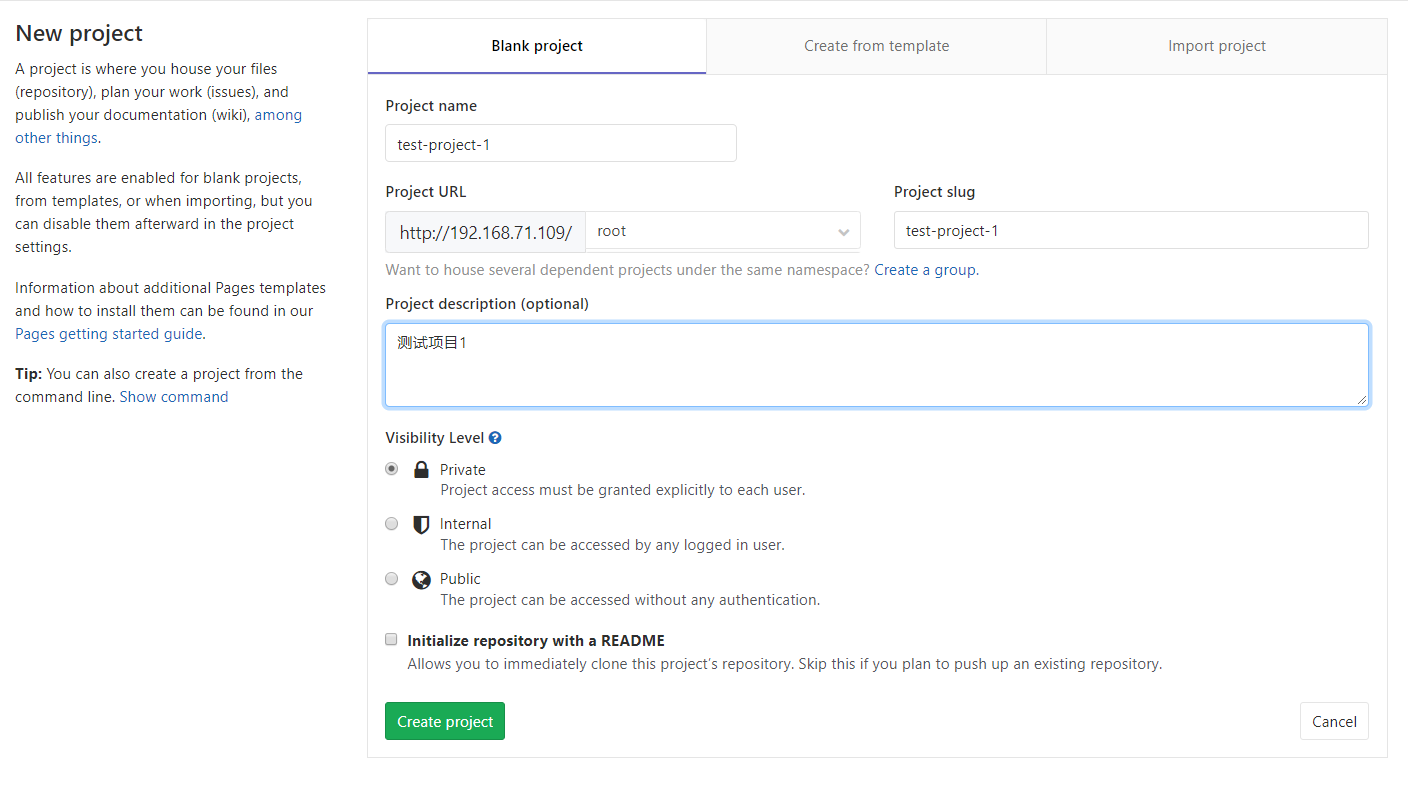
6、创建一个项目
点击Create a project后
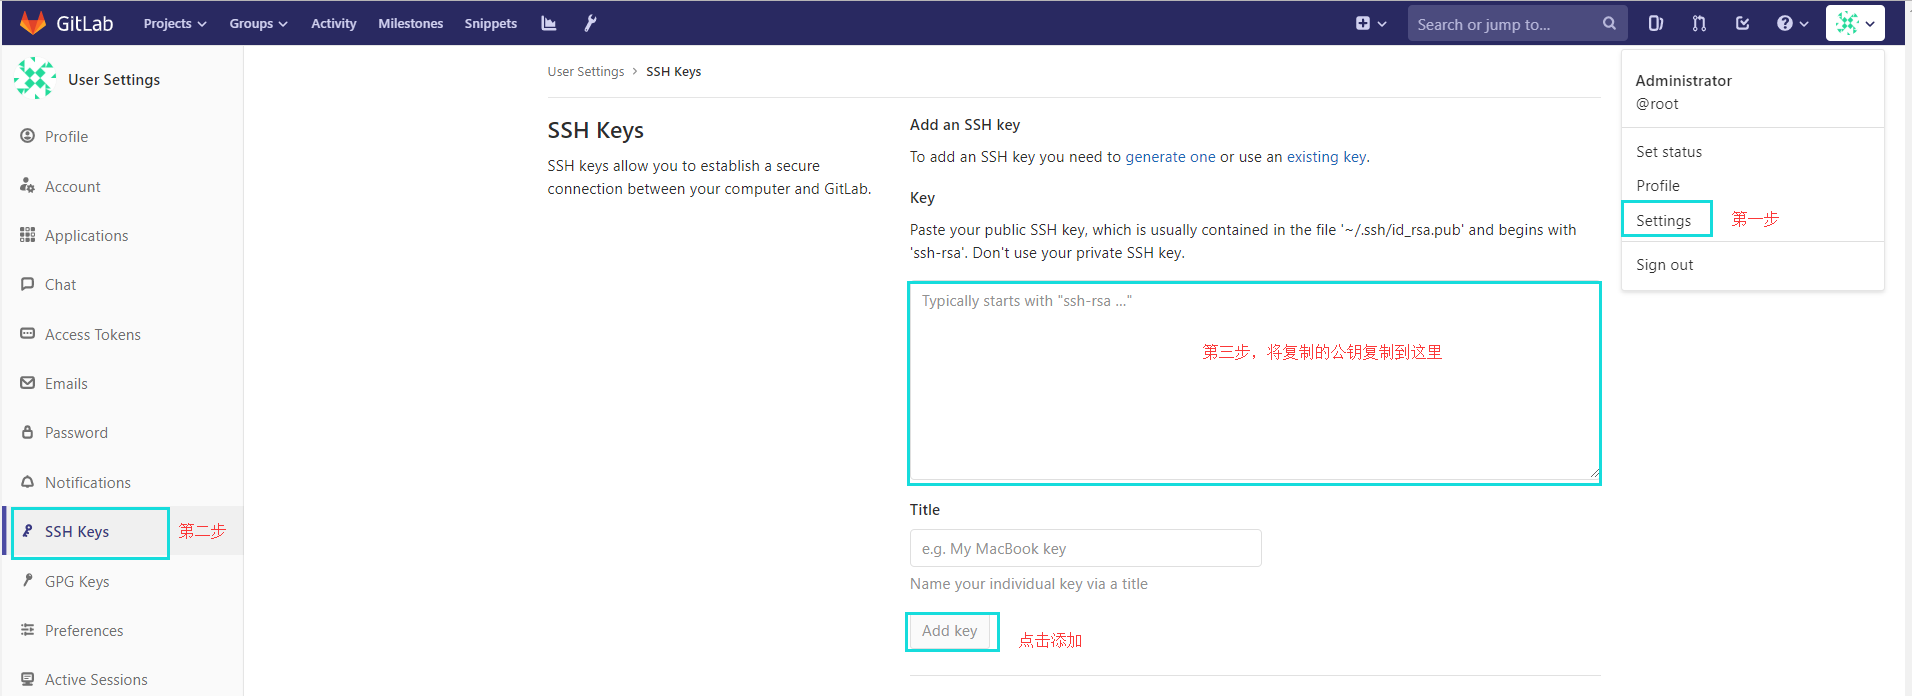
7、添加秘钥
$ ssh-keygen

$ cat .ssh/id_rsa.pub
ssh-rsa AAAAB3NzaC1yc2EAAAADAQABAAABAQDDP12ov0WzL9iE+ZjLE1ZrHe+YyUYg7ngPs9laamn1wge/4aLhD5whiSed2lx9TTbHgUegiuJGSbhCxaWMZzDi9ffHxvrEeK9AAR5zwVMjS35CxfKGkcZMjdev8d27HD3sz91j1t0wr8NToEvgDwaVVxNwP1sg1lCVSkUDZXzGZMaporW7vkhYdT8ZJeKv5oqiKokXkMYc8h85n64nk9nEyycaQ08aAc2M/GcLSzqt2xLkCbgoXMhzzEq0VDn8d+8Y66nEPDWPuqqK6qYS20mUCbrap/Y1vIJMlSsS/z1S+G/kZQh2Lkbri/H4HAoYkT5koaKOd2eE8YQU2k2YPc7t xxxxxx@qq.com
8、配置免密验证
9、测试提交
$ git clone git@192.168.71.109:root/test-project-1.git
$ cd test-project-1/
$ touch README.md
$ echo "test-project-1" > README.md
$ git add README.md
$ git commit -m "add README.md"
$ git push -u origin master
以上就是整个GitLab的安装、配置和使用的方式。如果想使用中文的界面,可以参考https://gitlab.com/xhang/gitlab
热门标签
每日一句
-
只有身体好才能学习好、工作好,才能均衡地发展。
——周恩来
今日排行
- yarn、npm配置阿里云国内镜像(新镜像)
 nodejs中使用npm和yarn,使用最新阿里云镜像 aliyun mirror,网上很多还是文章用的是下面这个地址~~yarn config set registry https://registry.npm.taobao.org~~
 - Mysql和MongoDB查询排名
 如何通过查询语句来查询某个数据的排名,本文主要介绍MySql和MongoDB两种数据库的查询方式来进行排名。
 - OpenCV-Python图像金字塔:向下取样和向上取样
 OpenCV-Python图像金字塔向下取样和向上取样使用高斯金字塔,主要使用如下两个函数:cv2.pyRdown和cv2.pyrUp.
 - Grafana安装
 最近为了搭建一套监控系统,本文主要记录如何安装Grafana
 - OpenCV-Python图像像素处理
图像都是由像素点构成的,图像分类:
1、二值图像(任意一个像素只能是0或1);
2、灰度图像(任意一个像素值都在0~255);
3、RGB图像(任意一个像素是(R,G,B)构成的),但是OpenCV是默认颜色通道是BGR.
点击排行
- VSCode插件 - 快速生成表格并格式化
 快速生成表格
 - Electron页面跳转、浏览器打开链接和打开新窗口
 Electron页面跳转、浏览器打开链接和打开新窗口
 - Electron打包错误“Error: Application entry file ..”解决方案
打包出现如下错误:Error: Application entry file "dist\electron\main.js" in the "D:\gui\demo2\build\win-unpacked\resources\app.asar" does not exist. Seems like a wrong configuration.
- Git保存和清除用户名、密码
 在使用Git的过程中,不想每次都输入用户名和密码去拉取代码,所以就需要保存这些信息,那么既然有保存了,就必须有清除功能。
 - mac git用户名和密码修改
 在Mac电脑中,如何对Git的用户名和密码进行修改呢?起初不懂Mac,所以整了很久,本文将记录如何对这个进行操作,以便后期使用。
 - Docker编译出现:temporary error (try again later)
 Docker编译镜像出现:fetch http://dl-cdn.alpinelinux.org/alpine/v3.12/main/x86_64/APKINDEX.tar.gz
ERROR: http://dl-cdn.alpinelinux.org/alpine/v3.12/main: temporary error (try again later)
WARNING: Ignoring APKINDEX.2c4ac24e.tar.gz: No such file or directory问题
Docker编译镜像出现:fetch http://dl-cdn.alpinelinux.org/alpine/v3.12/main/x86_64/APKINDEX.tar.gz
ERROR: http://dl-cdn.alpinelinux.org/alpine/v3.12/main: temporary error (try again later)
WARNING: Ignoring APKINDEX.2c4ac24e.tar.gz: No such file or directory问题