Kong的Admin管理界面
简介Kong是一个在Nginx中运行的Lua应用程序,可以通过lua-nginx模块实现,Kong不是用这个模块编译Nginx,而是与OpenRestry一起发布,OpenRestry已经包含了lua-nginx-module,OpenRestry是Nginx的一组扩展功能模块。
一、管理之Kong-Dashborad
1、安装
这里是用的-rm,所以是临时跑起来用
[root@localhost ~]# docker run --rm --name=kong-dashboard
  --network=kong-net
  -p 8080:8080 pgbi/kong-dashboard start
  --kong-url http://192.168.100.111:8001
  --basic-auth admin=123456

Connecting to Kong on http://192.168.100.111:8001 ...
This version of Kong dashboard doesn't support Kong v2.0 and higher.
这个目前不支持V2.0及以上版本,所以可以将Kong的版本降低一些。
二、管理之Konga
1、准备数据库
[root@localhost ~]# docker run --rm pantsel/konga:latest -c prepare -a postgres -u prstgresql://kong:kong@192.168.100.111:5432/konga

debug: Preparing database...
Using postgres DB Adapter.
Database `konga` does not exist. Creating...
Database `konga` created! Continue...
debug: Hook:api_health_checks:process() called
debug: Hook:health_checks:process() called
debug: Hook:start-scheduled-snapshots:process() called
debug: Hook:upstream_health_checks:process() called
debug: Hook:user_events_hook:process() called
debug: Seeding User...
debug: User seed planted
debug: Seeding Kongnode...
debug: Kongnode seed planted
debug: Seeding Emailtransport...
debug: Emailtransport seed planted
debug: Database migrations completed!
2、运行Konga
[root@localhost ~]# docker run -p 1337:1337
          --network kong-net
          -e "TOKEN_SECRET=123456"
          -e "DB_ADAPTER=postgres"
          -e "DB_URI=prstgresql://kong:kong@192.168.100.111:5432/konga"
          -e "NODE_ENV=production"
          --name konga
          pantsel/konga
3、访问
http://192.168.100.111:1337
第一次进入需要设置管理员账号和密码:

设置相应的信息,保存后会跳转到登录页面:

登录后,会让填写Kong信息:
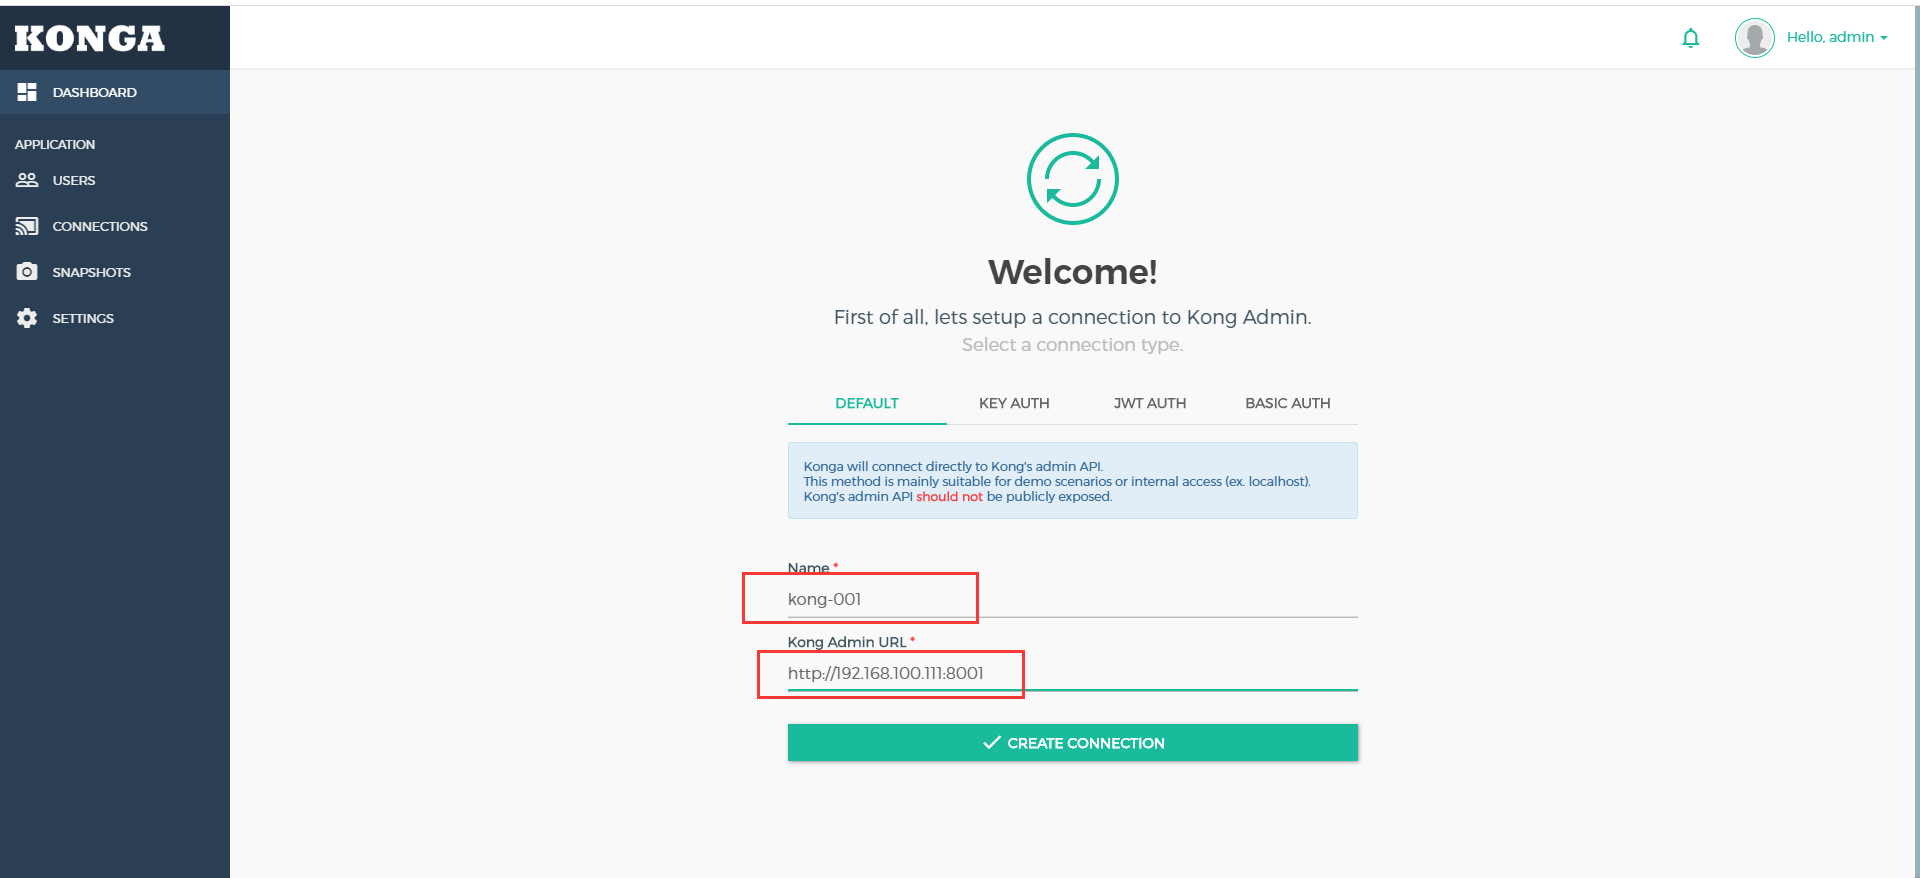
创建好链接后:
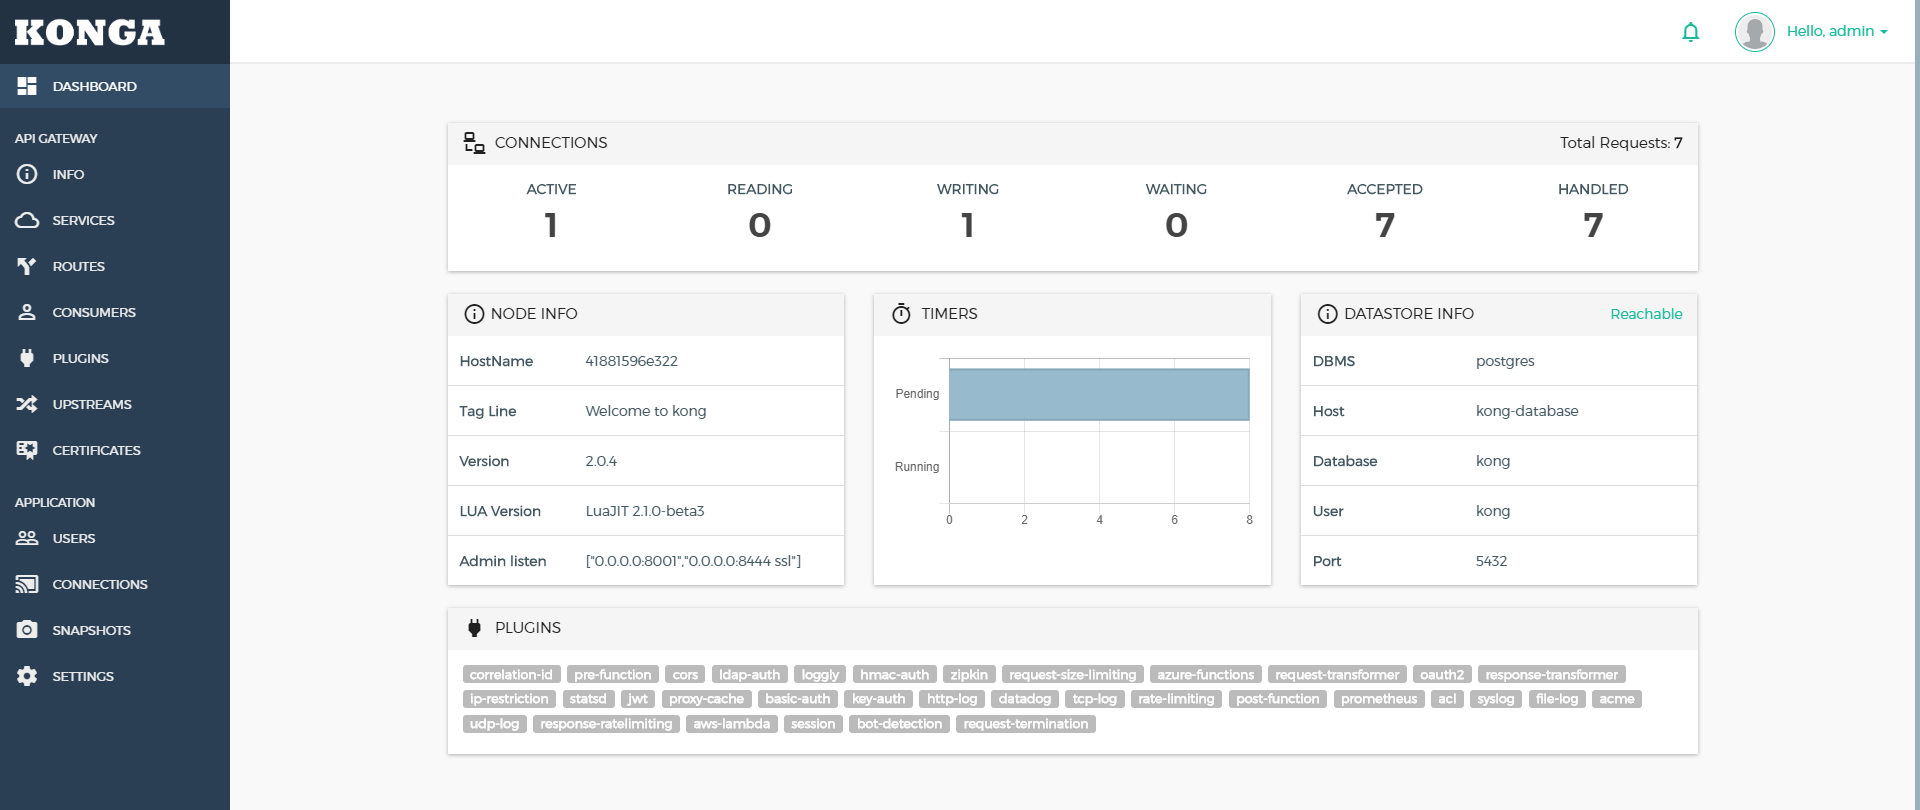
到此为止Konga就安装完成。
三、konga的基本使用
3.1、创建upstream
进入upstream界面:
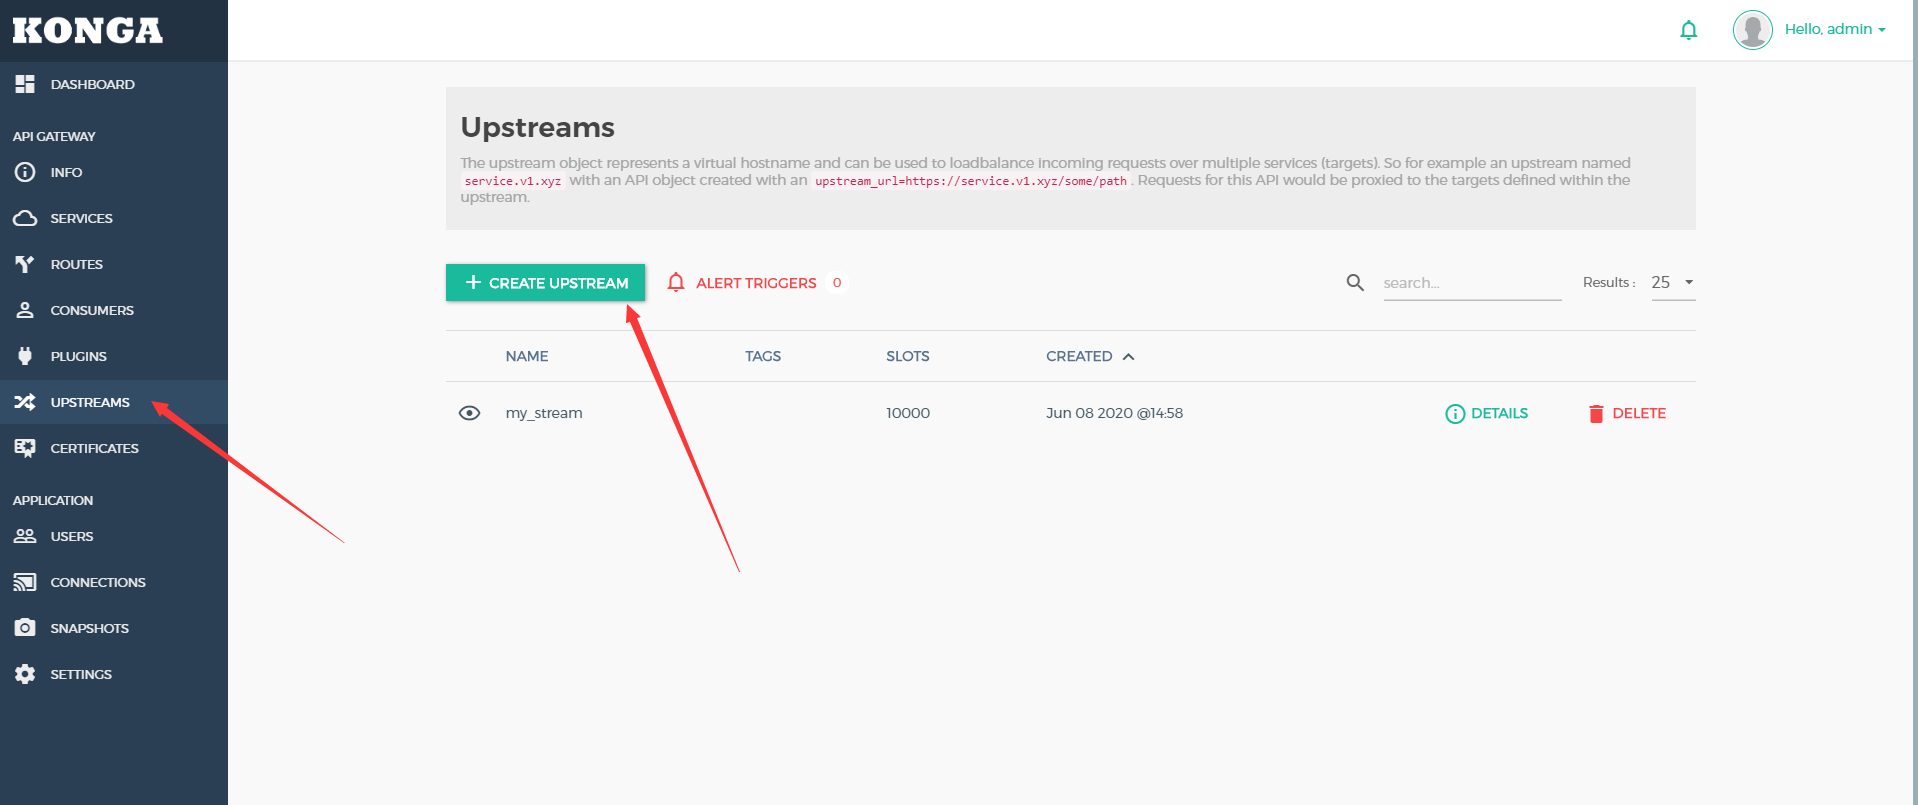
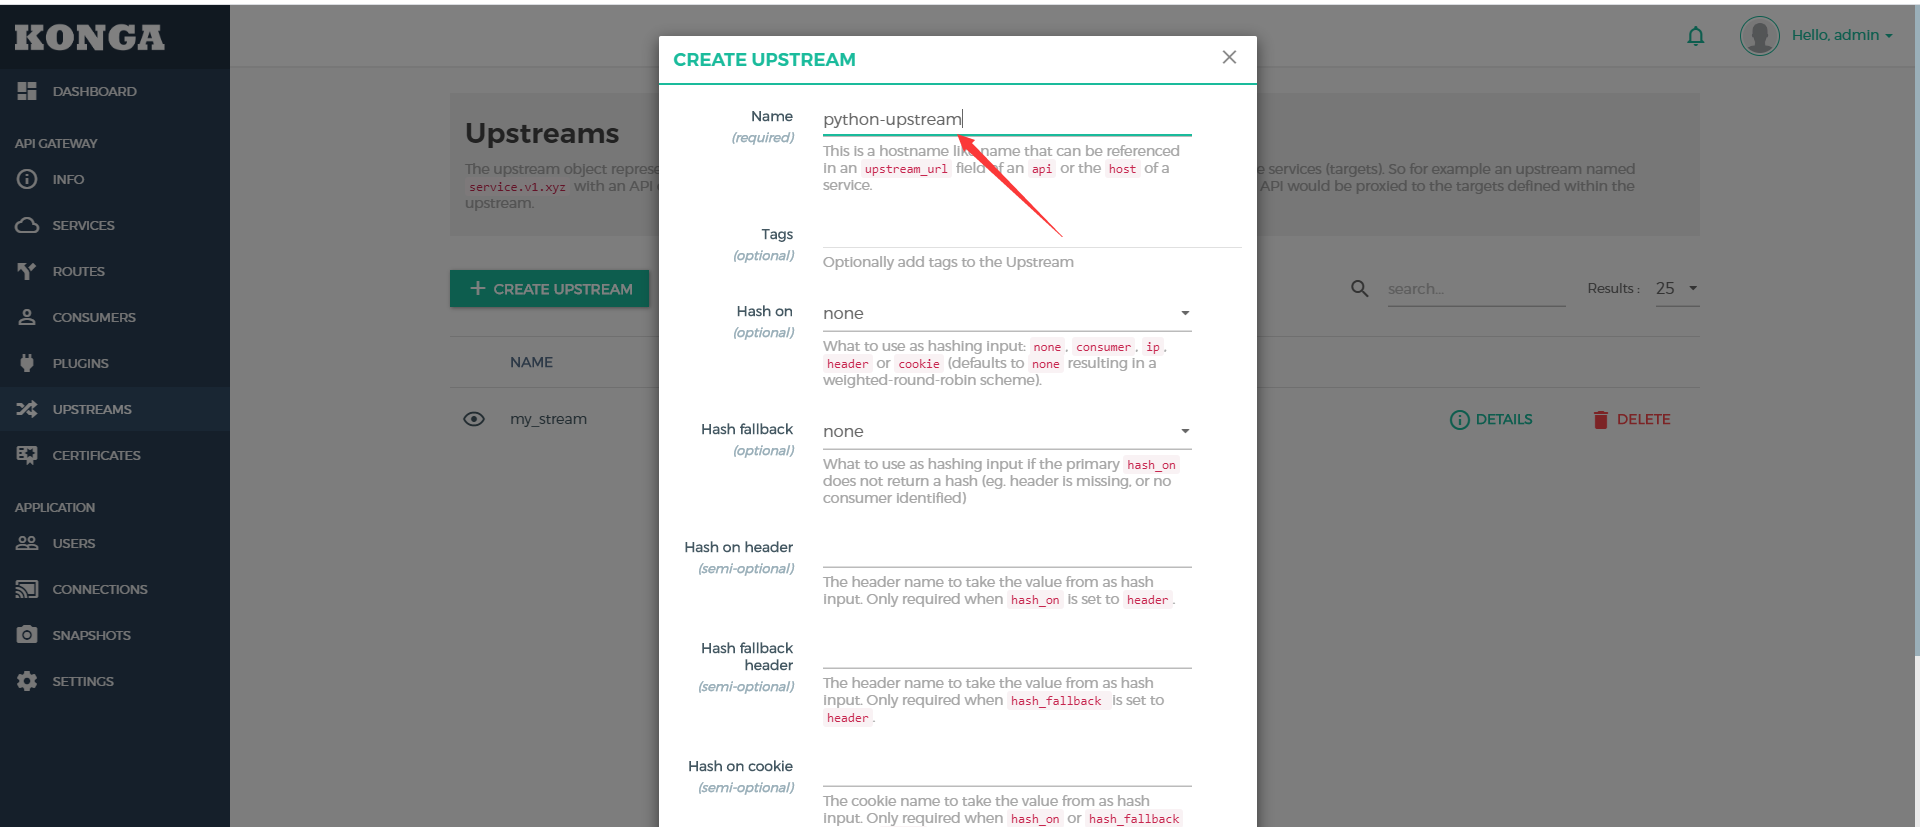
添加一个python-upstream的空的upstream:
3.2、设置Targets
在列表中点击python-upstream的DEFAULT按钮,切换到Targets:

点击添加Target:
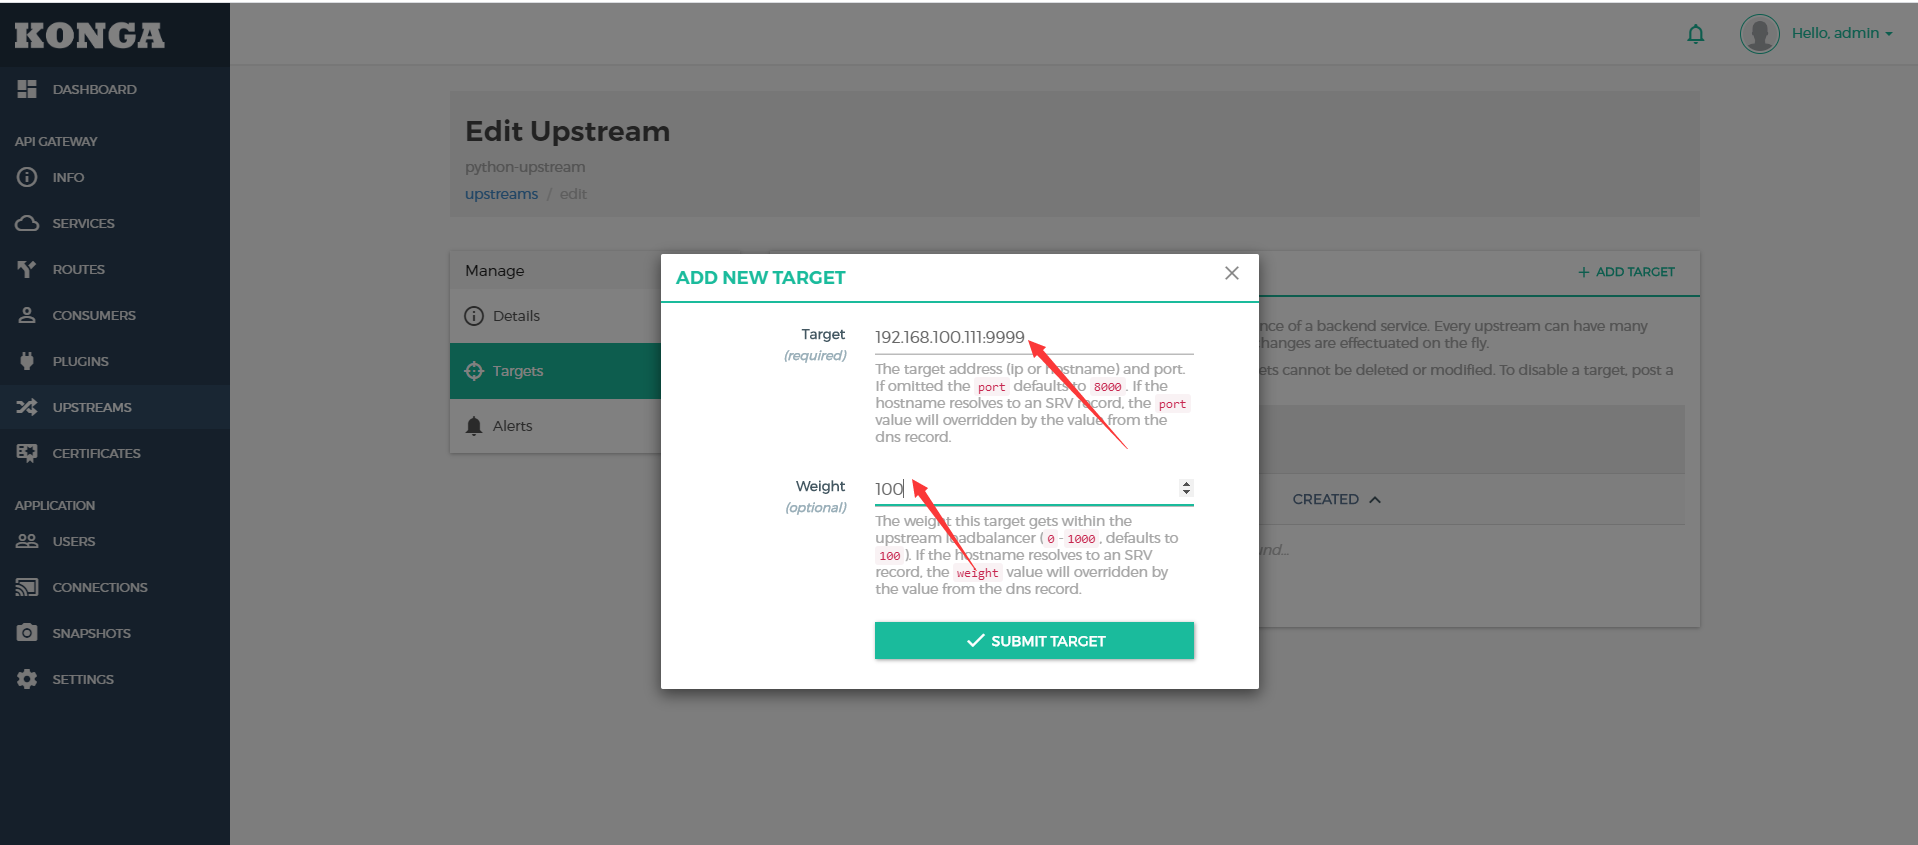
填写好后端服务的地址和端口,并且设置权重信息。
3.3、创建Service
进入Services的界面,点击添加Service

- Protocol:选择协议,这里我们代理后端是http
- Host:请求地址,这里必须设置成签名的upstream的名称
- Port:端口设置service的端口,可以自行指定
3.4、创建Route
在Services列表点击上一步创建的python-service,切换到routes

添加路由:
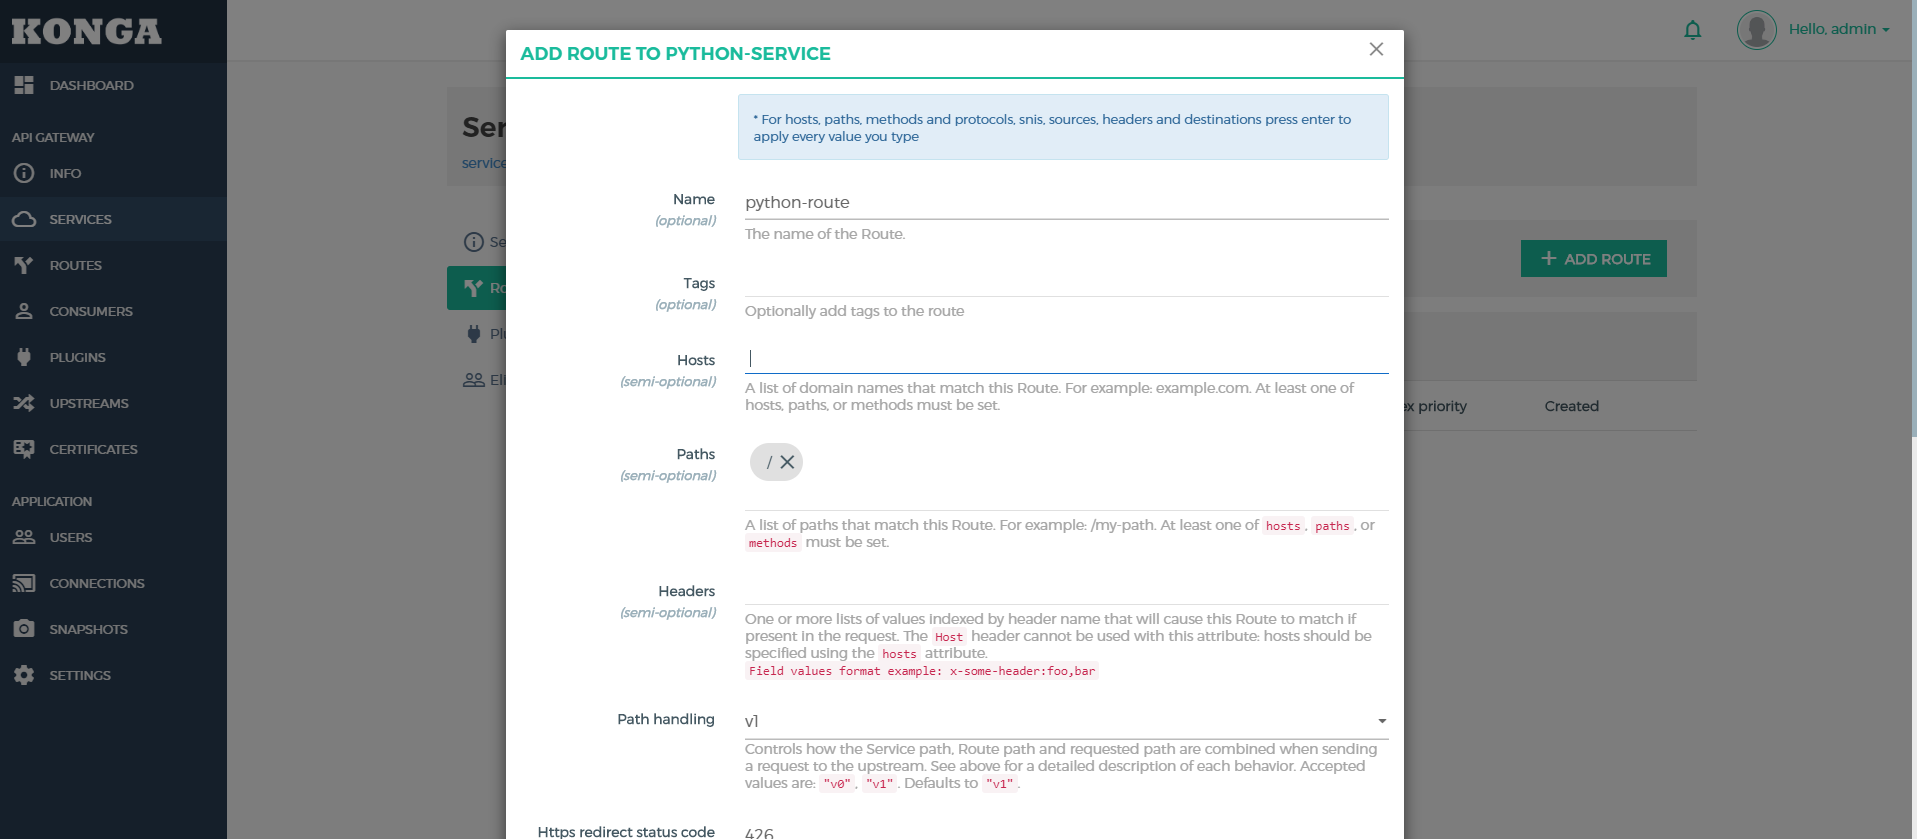
- Hosts:就是设置访问的域名,可以配置多个,必须回车
- Paths:设置路径,可以配置多个,必须回车
- Protocols:协议,默认是http和https
3.5、进行测试
1、启动一个python的web
[root@localhost ~]# python -m SimpleHTTPServer 9999
Serving HTTP on 0.0.0.0 port 9999 ...
2、端口访问
http://192.168.100.111:9999/
这里访问结果出来是运行目录里面的文件列表
3、Window配置hosts
192.168.100.111 python.test.com
4、然后直接通过域名进行访问
http://python.test.com/
访问结果如果跟第二步访问的一致即可。
 Golang打包一般的静态资源文件到二进制文件中还是比较简单,但是如果遇到使用Vue编写的后台界面,该如何打包呢?本文就是记录如何打包Vue到二进制包
 Python调用WPS把文档转换PDF,并把PDF转图片,首先需要安装WPS,然后利用pypiwin32把文档转化成PDF,再利用fitz、PyMuPD把PDF转化成图片
 Ansible-tower工具搭建和使用
 Centos中用Chrome将网页导出为PDF,chrome --headless --print-to-pdf https://developer.chrome.com/
 OpenCV-Python图像融合
 快速生成表格
 Electron页面跳转、浏览器打开链接和打开新窗口
 在使用Git的过程中,不想每次都输入用户名和密码去拉取代码,所以就需要保存这些信息,那么既然有保存了,就必须有清除功能。
 在Mac电脑中,如何对Git的用户名和密码进行修改呢?起初不懂Mac,所以整了很久,本文将记录如何对这个进行操作,以便后期使用。
 Docker编译镜像出现:fetch http://dl-cdn.alpinelinux.org/alpine/v3.12/main/x86_64/APKINDEX.tar.gz
ERROR: http://dl-cdn.alpinelinux.org/alpine/v3.12/main: temporary error (try again later)
WARNING: Ignoring APKINDEX.2c4ac24e.tar.gz: No such file or directory问题