Flutter:图片组件Image
简介在Flutter中要想显示图片,就需要用到Image组件,但是作为Image组件,用法有好几种,本文就主要介绍下Image的使用。
在Flutter中要想显示图片,就需要用到Image组件,但是作为Image组件,可以有很多构造函数:
- new Image:从ImageProvider获取图片
ImageProvider 是一个抽象类,主要定义了图片数据获取的接口load(),从不同的数据源获取图片需要实现不同的ImageProvider ,如AssetImage是实现了从Asset中加载图片的ImageProvider,而NetworkImage实现了从网络加载图片的ImageProvider。
下面都是图片的快捷的构造函数:
- new Image.asset:加载资源图片
- new Image.file:加载本地图片文件
- new Image.network:加载网络图片
- new Image.memory:加载Uint8List资源图片(本节不进行介绍,有兴趣的可以自己去了解)
1、加载网络图片
1.1、使用Image构造函数
        Image(
            width: 100,
            height: 100,
            image: NetworkImage(
              "http://m.imeitou.com/uploads/allimg/2021062109/suys1b2sczv.jpg",
            ),
          ),
1.2、使用Image.network构造函数
          Image.network(
            "http://m.imeitou.com/uploads/allimg/2021072019/yjrqktwktmy.jpg",
            width: 100,
            height: 100,
          )
2、加载本地资源图片
首先,需要在项目根目录下新建一个images目录,将图片1.jpg拷贝进去;
其次,在pubspec.yml中的flutter部分添加如下内容:
  assets:
    - images/1.jpg
2.1、使用Image构造函数
          Image(
            width: 100,
            height: 100,
            image: AssetImage("images/1.jpg"),
          ),
2.2、使用Image.asset构造函数
          Image.asset(
            "images/1.jpg",
            width: 100,
            height: 100,
          ),
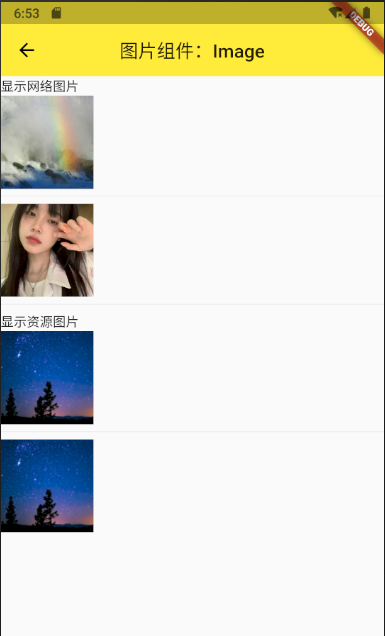
以上使用的完整代码:
import 'package:flutter/material.dart';

class ImageWidget extends StatelessWidget {
  @override
  Widget build(BuildContext context) {
    return Scaffold(
      appBar: AppBar(
        title: Text('图片组件:Image'),
        elevation: 0.0,
        centerTitle: true,
      ),
      body: Column(
        crossAxisAlignment: CrossAxisAlignment.start,
        children: [
          Text("显示网络图片"),
          Image.network(
            "http://m.imeitou.com/uploads/allimg/2021072019/yjrqktwktmy.jpg",
            width: 100,
            height: 100,
          ),
          Divider(),
          Image(
            width: 100,
            height: 100,
            image: NetworkImage(
              "http://m.imeitou.com/uploads/allimg/2021062109/suys1b2sczv.jpg",
            ),
          ),
          Divider(),
          Text("显示资源图片"),
          Image.asset(
            "images/1.jpg",
            width: 100,
            height: 100,
          ),
          Divider(),
          Image(
            width: 100,
            height: 100,
            image: AssetImage("images/1.jpg"),
          ),
        ],
      ),
    );
  }
}
3、使用本地图片
首先要导入io包:
import 'dart:io';
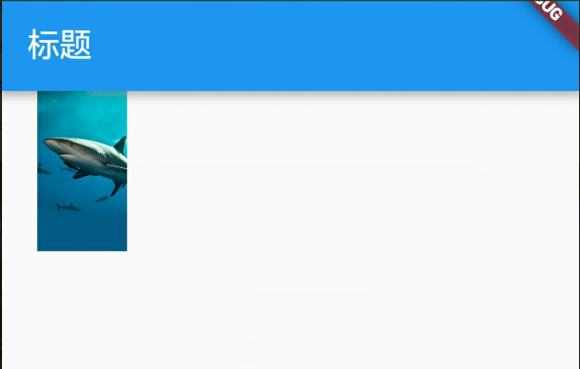
其次,保证图片地址是手机里的绝对路径,如
/system/media/Pre-loaded/Pictures/Picture_01_Shark.jpg
3.1、使用Image构造函数
return Image(
  image: FileImage(
      new File('/system/media/Pre-loaded/Pictures/Picture_01_Shark.jpg')),
  width: 100.0,
  height: 100.0,
);
3.2、使用Image.file构造函数
return Image.file(
  new File("/system/media/Pre-loaded/Pictures/Picture_01_Shark.jpg"),
  width: 100.0,
  height: 100.0,
);
上面我们知道如何加载图片的几种方式,但是图片还有一些属性,在这里进行说明下:
- image:ImageProvide类型,抽象类,需要自己实现获取图片的数据操作
- width: double类型,设置图片的宽度
- height:double类型,设置图片的高度
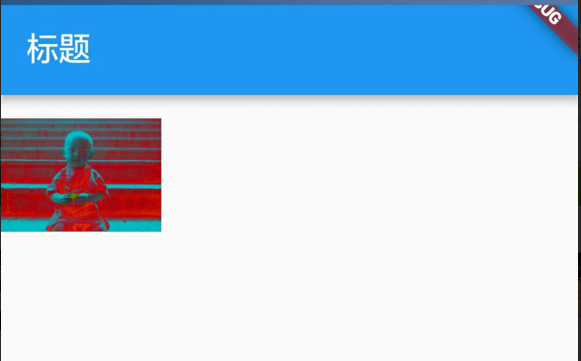
- color:Color类型,图片的颜色
- colorBlendMode:BlendMode类型,图片的混合模式
- alignment:Alignment类型,图片的对齐方式
- repeat:ImageRepeat类型,图片的重复方式
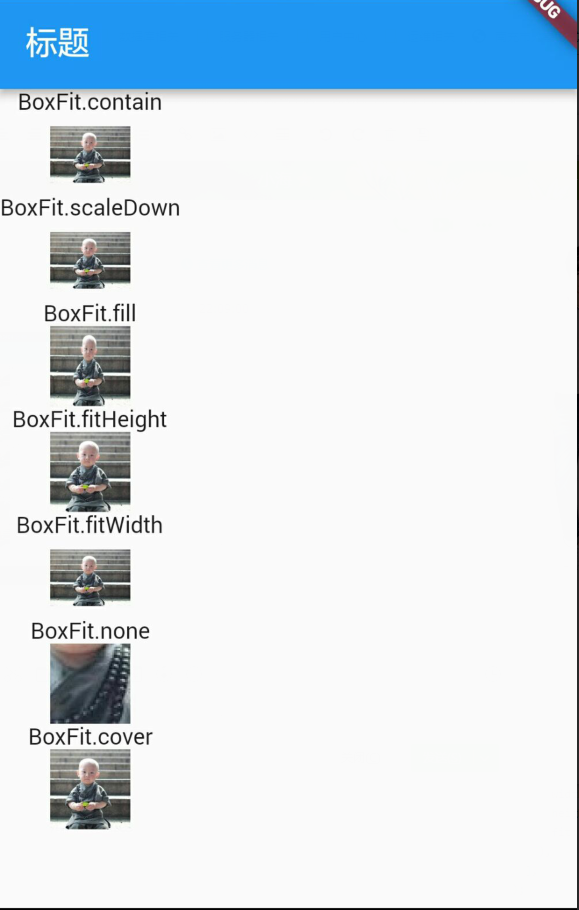
- fit:BoxFit类型,图片的填充模式
BoxFit取值:
| 取值 | 说明 |
|---|---|
| BoxFit.fill | 全图显示,显示可能拉伸,充满 |
| BoxFit.contain | 全图显示,显示原比例,不需充满 |
| BoxFit.cover | 显示可能拉伸,可能裁剪,充满 |
| BoxFit.fitWidth | 显示可能拉伸,可能裁剪,宽度充满 |
| BoxFit.fitHeight | 显示可能拉伸,可能裁剪,高度充满 |
| BoxFit.none | 原始大小,默认 |
| BoxFit.scaleDown | 效果和contain差不多,但是此属性不允许显示超过原图片大小,即可小不可大 |
4、Fit属性使用
return Column(
  children: <Widget>[
    Text('BoxFit.contain'),
    Image.network(
      'https://api.hi917.com/uploads/20180830/9f6b9b51c17748c62d503ec8834143ed.jpg',
      width: 50.0,
      height: 50.0,
      fit: BoxFit.contain,
    ),
    Text('BoxFit.scaleDown'),
    Image.network(
      'https://api.hi917.com/uploads/20180830/9f6b9b51c17748c62d503ec8834143ed.jpg',
      width: 50.0,
      height: 50.0,
      fit: BoxFit.scaleDown,
    ),
    Text('BoxFit.fill'),
    Image.network(
      'https://api.hi917.com/uploads/20180830/9f6b9b51c17748c62d503ec8834143ed.jpg',
      width: 50.0,
      height: 50.0,
      fit: BoxFit.fill,
    ),
    Text('BoxFit.fitHeight'),
    Image.network(
      'https://api.hi917.com/uploads/20180830/9f6b9b51c17748c62d503ec8834143ed.jpg',
      width: 50.0,
      height: 50.0,
      fit: BoxFit.fitHeight,
    ),
    Text('BoxFit.fitWidth'),
    Image.network(
      'https://api.hi917.com/uploads/20180830/9f6b9b51c17748c62d503ec8834143ed.jpg',
      width: 50.0,
      height: 50.0,
      fit: BoxFit.fitWidth,
    ),
    Text('BoxFit.none'),
    Image.network(
      'https://api.hi917.com/uploads/20180830/9f6b9b51c17748c62d503ec8834143ed.jpg',
      width: 50.0,
      height: 50.0,
      fit: BoxFit.none,
    ),
    Text('BoxFit.cover'),
    Image.network(
      'https://api.hi917.com/uploads/20180830/9f6b9b51c17748c62d503ec8834143ed.jpg',
      width: 50.0,
      height: 50.0,
      fit: BoxFit.cover,
    ),
  ],
);
5、color属性使用
return Image.network(
  'https://api.hi917.com/uploads/20180830/9f6b9b51c17748c62d503ec8834143ed.jpg',
  width: 100.0,
  height: 100.0,
  color: Colors.red,
  colorBlendMode: BlendMode.difference,
);
5、repeat属性使用
return Image.network(
  'https://api.hi917.com/uploads/20180830/9f6b9b51c17748c62d503ec8834143ed.jpg',
  width: 100.0,
  height: 100.0,
  repeat: ImageRepeat.repeatY,
);
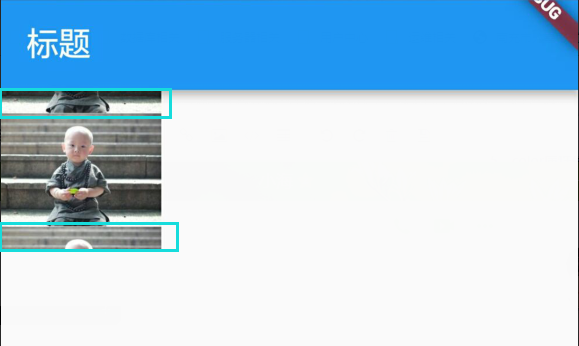
以上就是Image组件的基本介绍。
 快速生成表格
 在使用Git的过程中,不想每次都输入用户名和密码去拉取代码,所以就需要保存这些信息,那么既然有保存了,就必须有清除功能。
 在Mac电脑中,如何对Git的用户名和密码进行修改呢?起初不懂Mac,所以整了很久,本文将记录如何对这个进行操作,以便后期使用。
 对齐布局组件Align是将其下子组件按照指定对齐方式布局,并根据子组件的带下调整自己的大小。
 Python调用WPS把文档转换PDF,并把PDF转图片,首先需要安装WPS,然后利用pypiwin32把文档转化成PDF,再利用fitz、PyMuPD把PDF转化成图片
 Electron页面跳转、浏览器打开链接和打开新窗口
 Docker编译镜像出现:fetch http://dl-cdn.alpinelinux.org/alpine/v3.12/main/x86_64/APKINDEX.tar.gz
ERROR: http://dl-cdn.alpinelinux.org/alpine/v3.12/main: temporary error (try again later)
WARNING: Ignoring APKINDEX.2c4ac24e.tar.gz: No such file or directory问题